


Subaru Engine Drop: Safe Removal and Reinstall Guide
Pulling a Subaru engine is rarely difficult because of one complicated fastener. The risk comes from rushed preparation, unsupported weight, trapped wiring, and small details that are easy to lose once the bay is open.
A safe Subaru Engine Drop starts with a model-specific service procedure, a rated hoist, a stable workspace, and clear documentation. Disconnect and label every electrical, fuel, coolant, exhaust, and vacuum connection before lifting, then reinstall methodically with verified torque values, fluid checks, and a controlled first start.
This guide follows the job from preparation through transmission mating and post-install inspection. It also marks the points where a professional installer is the right choice, especially if you lack proper lifting equipment or the service information for your specific chassis. Before the hoist moves, the plan should account for the car, engine, transmission, workspace, and every component that must return to its original route.
Contact Crawford Performance for Subaru engine-build guidance
How to Plan a Subaru Engine Drop Before Touching the Hoist
A safe engine drop starts before the car is raised or a connector is unplugged. Confirm the exact Subaru platform, model year, transmission, and intended removal path, then pull the model-specific service manual and read the complete procedure. The manual controls lifting points, access requirements, fastener specifications, and any steps that vary between EJ, FA, and other engine families. If you cannot provide a stable workspace, suitable lifting equipment, or the correct service information, stop and use an authorized installer.
Prepare the workspace and the vehicle
Work on a level, solid surface with enough room to move the hoist, engine stand, drain containers, and removed parts without stepping around an unstable load. Keep the floor dry and clear. Put protective covers over the fenders and vulnerable engine-bay surfaces before tools or components begin moving. The service information directs technicians to cover the fenders and engine bay to protect the vehicle body. Follow the applicable service-manual preparation guidance for your model.
Set out labeled trays or bags for fasteners and small brackets. Take clear photos of hose routing, harness paths, ground locations, and bracket orientation before disassembly. Use a consistent label system on both the vehicle-side connector and the removed component. A photo is useful context, but it should not replace the service manual or a written record. Gather the tools listed by the procedure, including the correct sockets, extensions, drain equipment, approved lifting hardware, and a torque wrench for reassembly. Do not substitute guessed specifications for model-specific instructions.
Isolate energy and remove fluids first
Disconnect the battery ground before starting. This reduces the chance of a short circuit while electrical connections are being removed. The National Highway Traffic Safety Administration service guidance states, "Always disconnect the battery ground cable to prevent short circuiting." Review the electrical isolation guidance for the applicable procedure.
Treat the vehicle as an energy-isolation job. Prevent accidental reconnection, secure the keys away from the work area, and leave a visible note or tag identifying the vehicle as under service. OSHA's lockout/tagout guidance emphasizes procedures that protect technicians from unexpected energy releases. Use OSHA's lockout/tagout principles to structure that control.
With the engine cool, drain the engine oil and coolant completely into suitable containers before lifting. The service procedure calls for both fluids to be drained. This reduces spill risk and prevents fluid from moving unpredictably as the assembly tilts. Cap or protect open lines and ports as appropriate, and dispose of fluids through the proper recycling channel. Finally, compare your photos, labels, tool layout, and manual checklist before touching the hoist. Preparation is the point where an avoidable mistake is cheapest to correct. For platform context, start by identifying your specific engine. If the removal supports a performance build, review Crawford's STI upgrades for compatible parts before ordering.
Which Subaru Engine Removal Method Fits Your Car?
There is no universal answer to whether you should pull only the engine or remove the engine and transmission together. A Subaru engine drop is controlled by the chassis, model year, drivetrain layout, available clearance, and the equipment in your workspace. The factory procedure may support separating the engine from the transmission while leaving the transmission in the vehicle, or removing the powertrain as one assembly. Review the model-specific service information before choosing a path.
| Method | When it can make sense | Primary concern |
|---|---|---|
| Engine only | Transmission support and separation access are available, and the vehicle procedure permits the transmission to remain installed. | Clearance, alignment, and protecting the transmission input area during separation and refit. |
| Engine and transmission together | The model and equipment allow the complete powertrain to be supported and moved as one balanced assembly. | Load control, vehicle clearance, and having a hoist or support system rated for the combined assembly. |
The engine-only approach can reduce the amount of drivetrain work, but it requires careful separation and later mating. Removing the powertrain together can simplify engine-to-transmission separation on some vehicles, yet it demands more control over the assembly and the vehicle underneath it. The hardest part is rarely the first lift. It is maintaining control while connections, mounts, and clearances change. If you do not have a rated hoist, stable support, and the correct model documentation, use an authorized installer or experienced technician.
Disconnect in a controlled sequence
Before touching a fuel connection, release fuel-system pressure. Depressurizing the lines helps prevent fuel spray and reduces fire risk during disconnection, as outlined in the applicable service procedure. Then photograph and label every connector and hose. Labels are inexpensive insurance when several similar plugs, grounds, and vacuum lines are exposed at once.
Work through the engine-bay connections methodically rather than pulling on the harness. Disconnect the wiring harness and secure it away from the lift path. Remove or disconnect the fuel lines after pressure has been released. Drain and disconnect coolant hoses, then separate the exhaust from the exhaust manifold before lifting. Depending on the model, the intake manifold may need to come off for access to top-side connections.
Handle the air-conditioning system according to the vehicle procedure. When permitted, unbolt the compressor and move it aside while keeping the refrigerant hoses connected. Do not force or sharply bend those lines. Finish by checking remaining coolant, heater, vacuum, sensor, ground, and accessory hoses for attachment to the engine or body. A final walk-around with the labels and service manual prevents a missed connection from becoming a damaged component when the hoist takes the load.
These removal choices are documented in factory-oriented procedures. They distinguish between separating the engine and removing the powertrain as a unit: review the applicable removal guidance. For a broader build plan, compare the vehicle-specific options in Crawford's Crosstrek upgrades collection when that platform is your starting point.
How to Lift a Subaru Engine During a Subaru Engine Drop
The lift is where a careful Subaru Engine Drop can become an expensive repair. The engine should rise only after every connection, bracket, and obstruction has been verified. A hoist does not correct a poor angle or an unbalanced load. It only transfers that mistake into the engine bay, bodywork, subframe, or your hands.
- Confirm the lifting equipment. Use an engine hoist with a load rating appropriate for the complete assembly, including attached components that will remain during removal. Inspect the chain, leveler, hooks, and lifting hardware. Confirm that the engine lifting hook is secure before applying meaningful load. Keep the vehicle on a stable, level surface, set the parking brake, and use properly rated support equipment. If the hoist, workspace, or hardware is questionable, stop and move the job to a properly equipped facility.
- Use model-specific lifting points. Do not assume that a familiar-looking bolt, intake point, alternator bracket, or accessory mount is an approved lifting location. Subaru engines and brackets vary by model year and configuration. Follow the vehicle service manual for the approved lifting instructions and hardware arrangement. The manual controls over a generic engine-drop video or a setup that worked on another EJ or FA application.
- Secure a balanced load. Attach the lifting chain or leveler to the specified points, then take up slack gradually. The assembly should remain controlled rather than rolling unexpectedly as its mounts release. Keep hands and feet clear of pinch points. Before lifting farther, check that the chain is seated, the hooks cannot walk out, and the hoist has not shifted on its casters. If the engine tilts sharply or hardware bends, lower it immediately and correct the setup.
- Perform a short test lift. Raise the engine only enough to put slight tension on the lifting gear and relieve the mounts. Pause at this stage. Walk around the bay and inspect the radiator and front support area, fans, hoses, wiring, exhaust, brackets, and any component that could contact the engine. Look underneath as well. The oil pan must maintain clearance from the subframe throughout the lift, not merely after the engine clears its mounts.
- Lift in small stages. Continue upward slowly, watching the front and rear edges of the engine while a second person observes from a safe position. Some removals require a controlled change in angle, but never use the hoist to force the engine past a point of resistance. Stop if the oil pan approaches the subframe, the engine moves toward the radiator, a hose or harness becomes taut, or the hoist begins to roll or lean. Lower the assembly, identify the obstruction, and resolve it before continuing.
- Stabilize before moving away. Once clear, keep the engine low and controlled while repositioning the hoist. Do not swing a suspended engine across the shop. If external work will continue, transfer the engine to a suitable stand using the approved procedure before releasing the hoist. A clean, deliberate lift protects the engine and the vehicle, and it leaves you with a safer starting point for inspection and reinstallation.
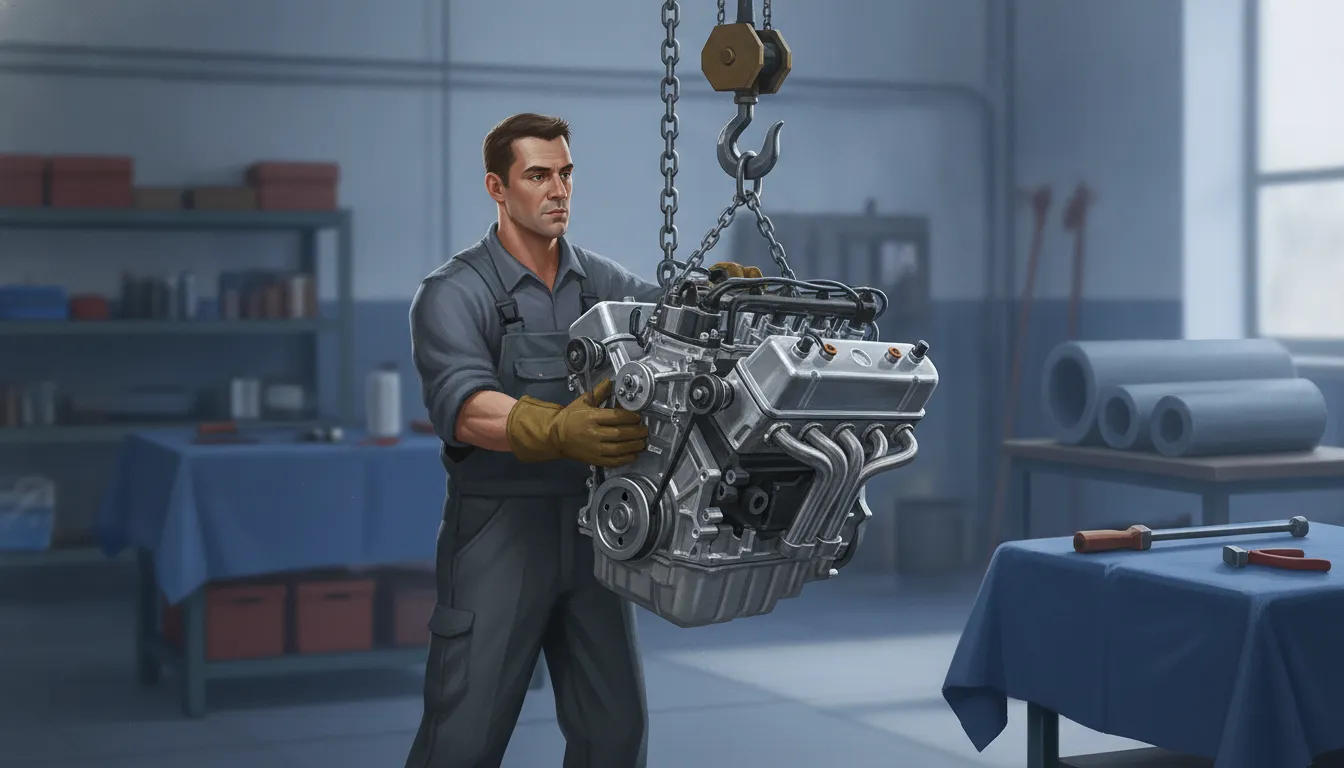
Clearance is a continuous check, not a single measurement. If the assembly cannot be lifted without force, pause the Subaru Engine Drop and return to the service-manual removal sequence. Review Crawford Performance's performance parts only after the installation plan and vehicle compatibility are clear.
Talk with Crawford Performance before choosing your engine path
What to Inspect While the Subaru Engine Is Out
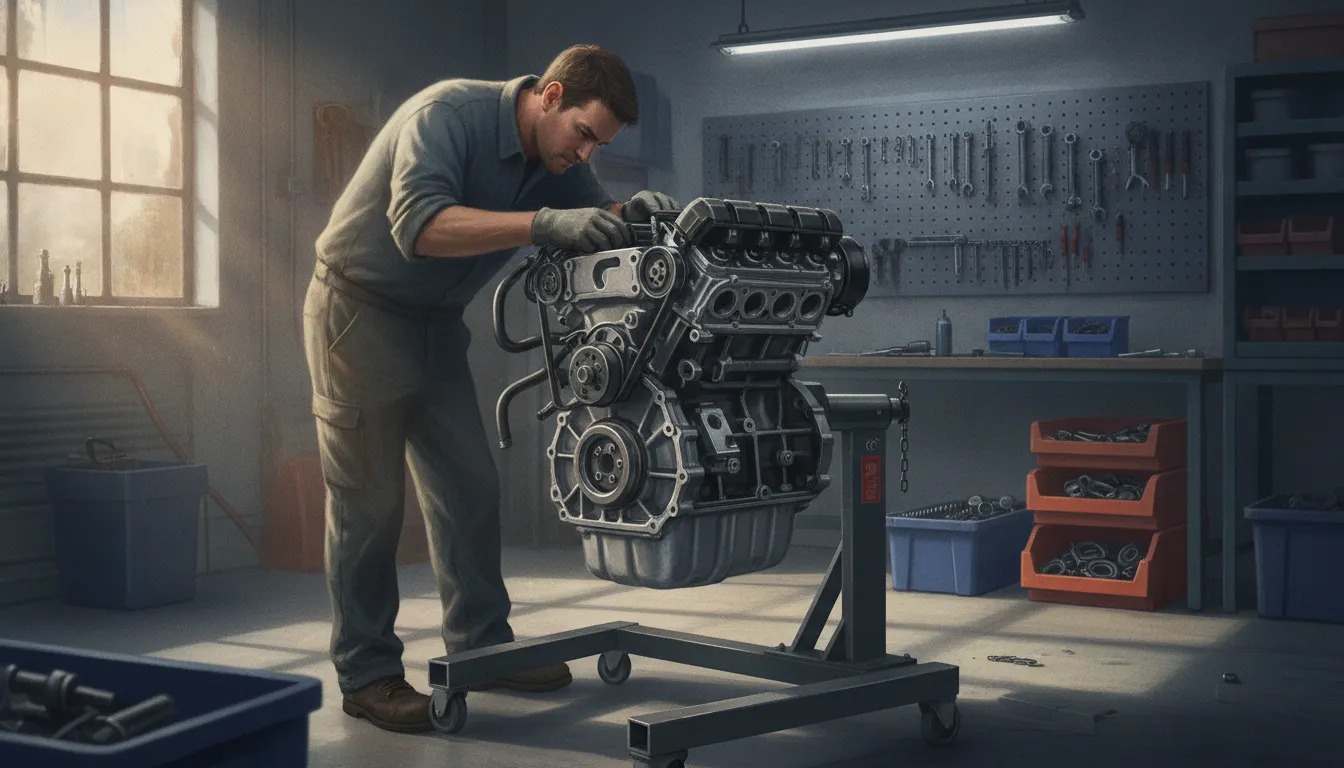
With the engine clear of the bay, access improves dramatically. Use that access to inspect the parts that are normally hidden behind the radiator, subframe, exhaust, and accessories. The goal is not to replace everything automatically. It is to identify wear, contamination, damage, and installation risks while correction is still straightforward. If the project includes a model-specific upgrade plan, Crawford's WRX upgrades collection is one place to confirm application details.
Check the clutch and transmission interface
On a manual-transmission car, inspect the clutch disc, pressure plate, and release bearing before reinstalling the engine. Look for uneven wear, oil contamination, heat damage, damaged splines, and a release bearing that feels rough or noisy. Inspect the flywheel surface and confirm that the clutch hardware is appropriate for the engine and transmission combination. If the clutch is near the end of its service life, this is the least expensive time to address it because the engine is already out.
For an automatic transmission, inspect the mating surfaces and confirm that the torque converter remains correctly engaged before bringing the engine and transmission together. Do not use the bell-housing fasteners to pull an assembly into alignment. Resistance usually indicates a positioning or engagement problem that needs to be corrected first.
Inspect mounts, seals, hoses, and wiring
Check each engine mount and bracket for torn rubber, distortion, cracked welds, or missing hardware. Inspect accessible front and rear seals for seepage, then examine coolant hoses, vacuum lines, fuel connections, and wiring for hardening, chafing, heat damage, or brittle connectors. Pay particular attention to harness sections that pass near exhaust components. A clean label system and clear photos taken during removal make reassembly more reliable, especially when several connectors look similar.
Clean the block, mounting faces, and surrounding components before installation. Remove old gasket material without gouging sealing surfaces, keep dirt out of open ports, and cap or cover exposed lines. A clean work area also makes future leaks easier to identify. If you are evaluating a replacement engine, understanding the long block and short block differences helps clarify which external components must transfer and which areas deserve inspection.
Support the engine and document the inspection
Use a properly rated engine stand when the engine needs external work. Confirm that the stand is securely attached to suitable mounting points, that the load is balanced. And that the stand and floor are stable before rotating or moving the assembly. Never rely on a jack, improvised supports, or an unsecured work surface to hold the engine.
Create a documented inspection list before parts are cleaned or removed. Record clutch condition, mount condition, seal observations, hose and harness findings, fastener locations, damaged clips, and any parts set aside for replacement. Crawford Performance applies hand-assembled precision, clean-room protocols, serialized components, and torque documentation to its custom engine process. Applying the same discipline to your inspection gives every decision a traceable basis without assuming that every component needs replacement.
How to Mate the Transmission and Torque the Assembly
Once the engine is suspended in the correct position, transmission mating should be controlled, gradual, and free of force. The input shaft, clutch, torque converter, dowels, and mounting faces must align naturally. If the assembly does not come together with light, even pressure, stop and find the obstruction. Do not use bell-housing bolts to pull the engine and transmission together. That can damage clutch components, misload locating dowels, or crack the transmission case.
Manual transmission clutch alignment
For a manual transmission, confirm that the clutch disc is centered before bringing the engine toward the bell housing. Use the correct alignment tool for the clutch and verify that the disc hub faces the transmission. Keep the engine and transmission on the same general axis, then work the input shaft into the clutch disc with small, controlled movements. Never hang the engine from the transmission input shaft or force the shaft through a misaligned disc.
When the mating faces are close, check that the dowels are entering their bores and that no harness, hose, bracket, or heat shield is trapped between the cases. A small rotation of the crankshaft may help the splines engage, but only when the engine is safely supported and the procedure for your model allows it. Once the faces are fully seated, install the fasteners by hand.
Automatic transmission torque-converter seating
Automatic Subaru applications require an additional check before the engine reaches the transmission. The torque converter must be fully seated in the transmission and engaged with the oil pump gear. The service procedure cited in the research requires verifying this engagement before assembly. If the converter is not seated, tightening the bell housing can force the engine against the converter and damage the pump or related components.
Keep the converter positioned correctly while you bring the engine and transmission together. Confirm that the mating surfaces close evenly, the locating dowels seat, and the converter remains properly engaged. Do not rotate or force components in a way that conflicts with the model-year service procedure.
Hand-start fasteners, align mounts, then torque
Start every bell-housing fastener by hand for several threads. Snug the fasteners in a staged, alternating pattern so the cases draw together evenly. Then align the engine mounts with their brackets before fully tightening the mount hardware. Mount misalignment can place unnecessary stress on the brackets and make the final installation difficult.
Use the exact service-manual torque values for your specific Subaru model year, transmission, fastener location, and hardware condition. Do not substitute a remembered number or a generic internet specification. The applicable procedure requires tightening bolts to specified torque values, and the correct sequence may matter as much as the final setting. Record the values and sequence in your build notes. This same discipline matters when installing a new long block, especially when documenting a hand-assembled performance engine.
Before lowering the hoist completely, inspect the bell-housing seam, mounts, grounds, and nearby lines. The assembly should be fully supported by its mounts, with no visible gap, trapped wiring, or fastener that was forced into position. If the engine is being prepared for a larger performance project, Crawford's engine-build collection can help frame the next planning conversation.
What to Check Before the First Start
Do not treat the first start as the moment to discover what was missed during the installation. Before reconnecting the battery, work through the engine bay methodically. Confirm every fluid, connection, hose, and fastener against the model-specific service procedure. Subaru systems and engine generations vary, so the factory manual controls whenever its instructions differ from a general checklist.
Prime the fluids and cooling system
Refill the engine oil and inspect the level before starting. Check the transmission fluid as well, particularly on an automatic-equipped vehicle, where level and fluid condition matter after the engine has been reinstalled. Refill the cooling system with the specified coolant, then bleed trapped air according to the model procedure. Air pockets can prevent proper circulation and contribute to overheating. The service references call for refilling fluids, checking for leaks, and bleeding air from the cooling system before operation.
Verify wiring, hoses, and belt drive
Use your labels and installation photos to confirm that every engine sensor connector is seated, clean, and locked. Reconnect the engine-to-chassis ground straps securely. A forgotten ground can create intermittent electrical faults or a no-start condition. Check each vacuum hose for the correct routing and connection, then inspect hose clamps for even, tight seating.
Follow the harness through the bay by hand. It must be secured away from exhaust manifolds, up-pipes, downpipes, and other hot components. Look for pinch points near brackets, belts, pulleys, and the radiator fan. Check drive-belt routing and tension before the battery is connected. Incorrect tension can cause belt slip or premature wear.
Perform a leak and start-up inspection
With the fluids filled, inspect the oil pan, filter area, coolant connections, fuel system, power-steering components if equipped, and transmission interfaces. Clean up spilled fluids so fresh leakage is easy to identify. Confirm that hose clamps, electrical connections, grounds, and battery terminals are clean and tight. Reconnect the battery only after this inspection is complete.
On the first crank, monitor warning lights, fluid pressure, temperature, unusual noise, and any visible leak. Shut the engine down immediately if a serious fault appears. Do not allow a small installation error to become component damage.
Follow the documented break-in plan
Break-in is not interchangeable between every engine build. Crawford Performance documents proper break-in procedures for its custom engine builds, and its customer-specific documentation includes a 12-month/12,000-mile warranty. Those are Crawford-specific terms, not universal results or guarantees for every Subaru engine drop. Follow the instructions supplied with the exact build, record the initial checks and heat cycles, and monitor coolant condition after the first few operating cycles. If you do not have a rated hoist, stable workspace, or model-specific knowledge, have an authorized installer complete the final checks and first start.
For general vehicle safety context, review the NHTSA service guidance. Your model-specific service manual controls the exact removal and installation procedure.
Contact Crawford Performance before your Subaru engine installation
Frequently Asked Questions
How long does it take to pull a Subaru engine?
Time depends on the model year, workspace, tools, rust, and whether the engine separates from the transmission or the powertrain comes out together. A careful first-time installer should allow a full workday or more, including labeling, fluid draining, disconnection, inspection, and cleanup. Rushing the lift creates avoidable damage and safety risks.
Do I need to remove the transmission to pull a Subaru engine?
No. Many Subaru procedures separate the engine from the transmission while the transmission remains supported in the vehicle. Removing the engine and transmission as a unit can make sense when your vehicle, equipment, or planned work favors that approach. Follow the service manual for your exact chassis and drivetrain layout.
What tools are required for a Subaru engine removal?
Plan on a rated engine hoist, secure lifting hardware, appropriate jack stands, hand tools, fluid drain equipment, labels or masking tape, and containers for removed fasteners. Protect painted surfaces, depressurize the fuel system before opening fuel lines, and verify every lifting point against the model-specific service manual. Never rely on a jack alone to support the vehicle or engine.
How do you mate the transmission when reinstalling a Subaru engine?
Keep the transmission supported, align the engine mounts and dowels, and bring the assemblies together without forcing them. On automatic-transmission cars, confirm that the torque converter is fully engaged with the transmission oil pump before tightening the bell-housing fasteners. Use the exact service-manual torque values, then reconnect grounds, harnesses, hoses, and sensors before refilling fluids and checking for leaks.
Contact Crawford Performance for Subaru Engine Guidance
A careful engine drop depends on model-specific procedures, clean documentation, and the right equipment. If you are planning a build or installation and want a second set of experienced eyes on the process. Crawford Performance can discuss practical guidance for your Subaru project.
Contact Crawford Performance to plan your Subaru engine project